Showing posts with label Embossing. Show all posts

Monday, 1 February 2016


Morning,
Hope it’s a good one for you.
Last month we had an amazing number of entries to the Challenge blog, thanks to everyone who took part.
The Calender Challenge was super, and a great number of entries for the start of this Challenge too.
The 1st of the month, so that means a new Challenge at the Clarity Stamp Blog Challenge, this month’s theme is love.
Hope to see you taking part in either of both Challenges. Don’t forget to see all by tan mates creations at http://claritystampchallenge.blogspot.co.uk/
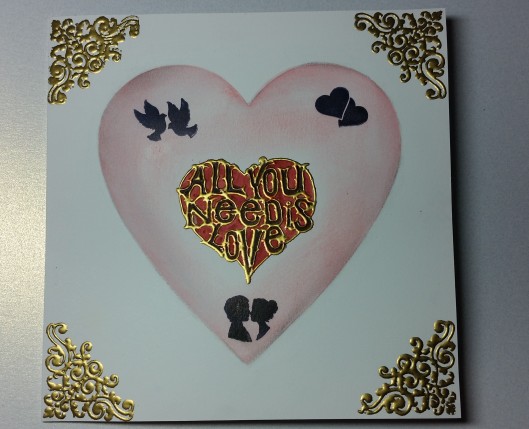
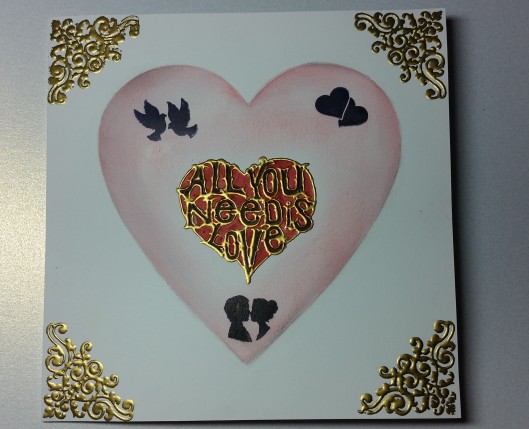
This is my little card and I hope you like it.
2016-01-27 20.37.47
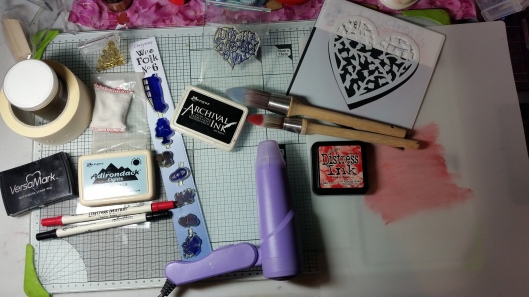
INGREDIENCE
2016-01-27 20.35.27
Stamps are: 
Stencil is:
2016-01-27 19.25.44
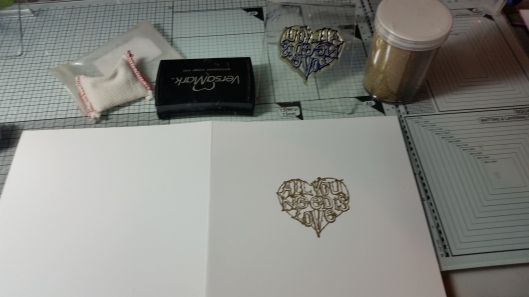
Take a 6 x 6 inch white card blank. Dust with an anti-static pad.
Using versamark stamp you image onto the centre of the card, cover with gold embossing powder and heat from underneath to get a smooth embossed image.
2016-01-27 19.42.08.jpg
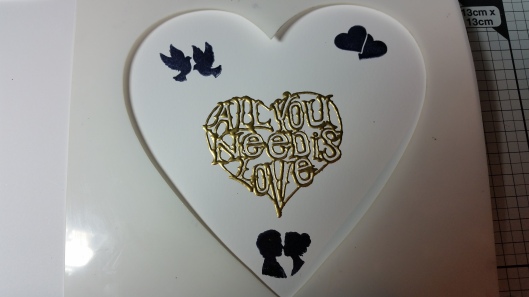
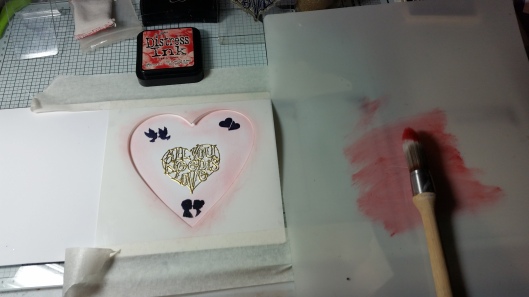
Place the outer part of the stencil over the image making sure to position exactly and tape in place using low tack masking tape. Stamp your little images with black archival.
2016-01-27 19.46.13.jpg
I blended some of the red brick distress ink over the blending mat. Distress inks will bubble if you don’t blend them I then very gently sweeping from the sides brushed on the ink. Gently does it. Blend from the sided in to help give a fuller effect to the heart.
I next blended a little cloudy blue to the edges of the heart again to give some shadow again for that rounding effect. I then removed the stencil and very lightly used a soft pencil on the outer edges of the heart for shadow.
2016-01-27 20.37.47
Finally I used the ornate corner in each corner, using the same gold embossing powder, and coloured in the letters with a black distress pen and the inner heart with the red brick distress pen.
If you have any questions just leave me a message, love if you would leave me a comment.
Bye for now.
Naomi

Sunday, 8 February 2015

Good morning,
Hope you dropped in to see the amazing artwork made by the Clarity Stampers for last month's challenge if not yet here is the link. http://claritystampchallenge.blogspot.co.uk/2015/01/challenge-23.html
This month challenge begins this morning and the theme is "Floral". Hope you will join in.
The blog design team have made some very inspiring projects and everyone one of them is unique
and so different.
Well I love Fuchsias, and am crazy about Clarity Stamps Fuchsia Stamps. I have also
been having great fun with Kraft Card, so my project this month combines them both.
Hope you like it.
Fushia Jan 2015  watermarked
What I used.
2015-01-13 10.49.03
Take some craft card mine was 8 x 8
Stamp the sentiment with Black Archival.
(http://www.claritystamp.co.uk/Clear-Stamps/Verses-and-Words/4975-/The-Joys-Of-Life).
Next stamp the fuchisas with  versamark ink and detailed white embossing powder, and heat emboss, masking as required.
I would suggest doing each flower separately, don't forget your talc or non static pad as white
can leave a lot of speckles if you are not careful. Here I am partway through the
stamping and heat embossing.
The link to the fuchia stamps is below.
http://www.claritystamp.co.uk/Clear-Stamps/Floral/4857-/Large-Fuchsia-Clear-Stamp---As-See-On-TV
http://www.claritystamp.co.uk/Information/Search/14415-/Repositionable-Fuchsia-Clear-Stamps---As-Seen-On-TV
2015-01-12 19.33.18
When you have finished masking, stamping and embossing.
Take some white gesso and add a little water until it is the consistency of milk.
With a very fine paint brush paint inside all of your stamped images with the gesso.
2015-01-12 20.04.54
I then coloured in the images using my Spectrum Noir pencils from the  Floral and Natural sets.
3 Shades of green and 3 of red. I also used the blending solution to complete the colouring and as the edges the stamping with a little green for added depth.
Fushia Jan 2015  watermarked
Don't forget to leave me a comment, I really appreciate it.
Bye for now.
Naomi